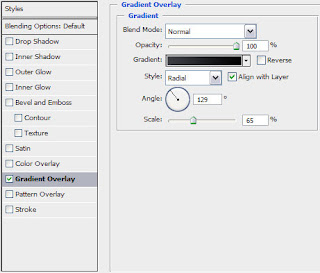
 Set the next parameters for the made layer: Blending Options>Gradient Overlay
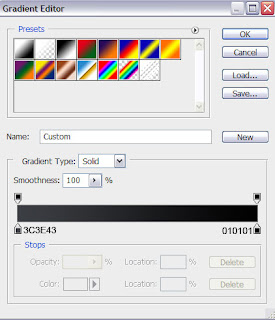
 Gradient’s parameters:
 Next we’ll try to draw the face of a robot transformer. In this case we’ll select the Pen Tool (P) and the Convert Point Tool for the necessary corrections. All the elements have white color.


 Make a copy of the last made layer and select Free Transform option to turn over the copy, situating it the same way shown below:
 For the next element we’ll choose the same tools indicated above:
 Make a copy of the last made layer containing the new element and select again Free Transform option to turn over the copy, placing it the way indicated below:


 Now we must put together all the elements composing the robot’s head into a single rasterized layer. In this case we’ll just press Ctrl button, mark out the corresponding layers and then press Ctrl+E. The new layer will need the next demonstrated parameters: Blending Options>Drop Shadow


No comments:
Post a Comment