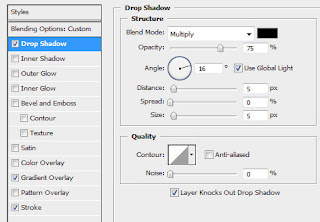
The layer’s parameters: Fill 0% Blending Options>Drop Shadow
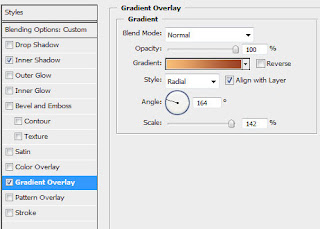
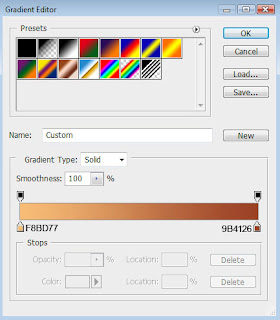
Blending Options>Gradient Overlay
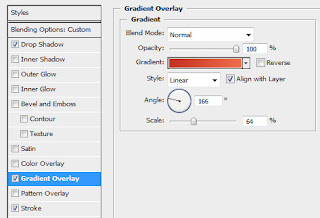
Gradient’s parameters:
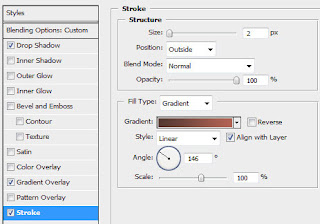
Blending Options>Stroke
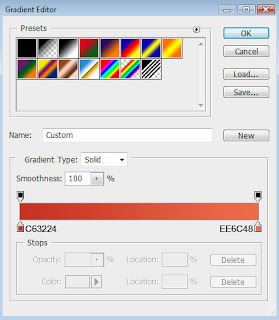
Gradient’s parameters:
Make two copies of the layer containing the button and choose Free Transform option to change the copies’ sizes, placing them the way demonstrated next picture:

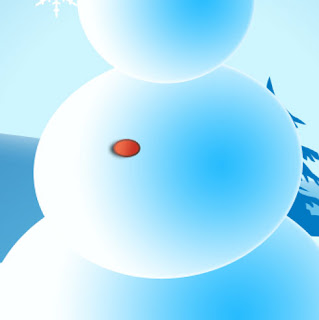
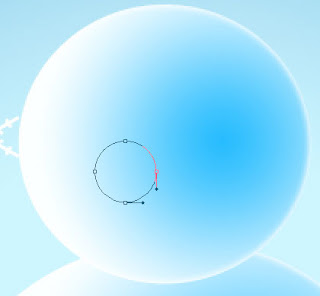
Using the previous tool, it’s possible to draw next the snow man’s nose:
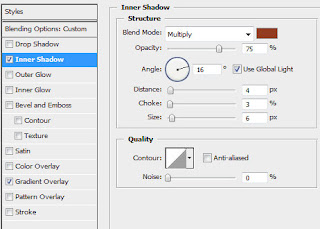
The layer’s parameters: Fill 0% Blending Options>Inner Shadow
Blending Options>Gradient Overlay
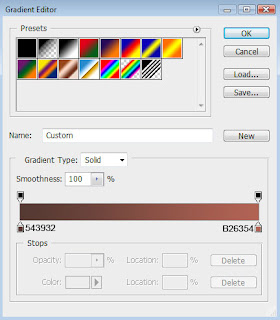
Gradient’s parameters:

Create a new layer and use on it a standard brush (
Brush Tool (B)) to draw the eyes and the mouth, belonging to the same snowman. The elements’ color is black.


Using the
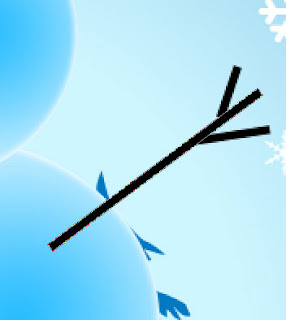
Line Tool (U), it’s time to picture a twig that will represent the snow man’s arm. The color in this case is black too.
Put together all the layers composing the twig into a single layer. In this case we’ll press Ctrl button, mark out the twig’s layers and press then Ctrl+E. Next we’ll make a copy of the new layer that we got and apply Free Transform option to turn over the copy, make the copy smaller and put it on the picture the same way shown below:


The picture is finished!
 Blending Options>Gradient Overlay
 Gradient’s parameters:
 Blending Options>Stroke
 Gradient’s parameters:
 Make two copies of the layer containing the button and choose Free Transform option to change the copies’ sizes, placing them the way demonstrated next picture:
 Using the previous tool, it’s possible to draw next the snow man’s nose:
 The layer’s parameters: Fill 0% Blending Options>Inner Shadow
 Blending Options>Gradient Overlay
 Gradient’s parameters:
 Create a new layer and use on it a standard brush (Brush Tool (B)) to draw the eyes and the mouth, belonging to the same snowman. The elements’ color is black.
 Using the Line Tool (U), it’s time to picture a twig that will represent the snow man’s arm. The color in this case is black too.
 Put together all the layers composing the twig into a single layer. In this case we’ll press Ctrl button, mark out the twig’s layers and press then Ctrl+E. Next we’ll make a copy of the new layer that we got and apply Free Transform option to turn over the copy, make the copy smaller and put it on the picture the same way shown below:
 The picture is finished!
No comments:
Post a Comment