Using the same instrument, represent the next layer belonging to the same ball, the layer having the color #4472FC
Represent the next layer of the fir tree toy. For the beginning select the
Ellipse Tool (U) and then the Convert Point Tool that will be helpful in changing the element’s tops. The layer has the color #092894
Applying the described above method, try to represent the next layer belonging to the same toy.
The layer’s parameters: Fill 0% Blending Options>Inner Shadow

Blending Options>Gradient Overlay
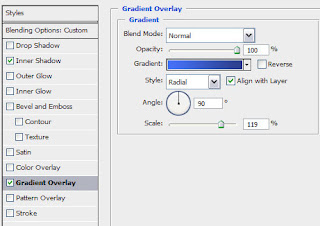
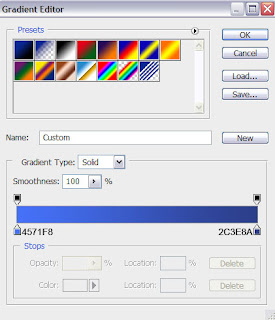
Gradient’s parameters:

Using the
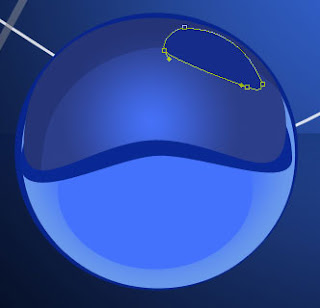
Pen Tool (P) and the Convert Point Tool, it’s possible to draw the shadow on the right top. Choose the color #152C8A
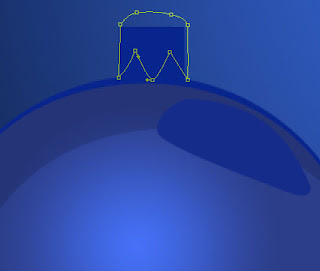
Next represent the top part of the ball, applying the Rectangle Tool (U) and the color #08258D
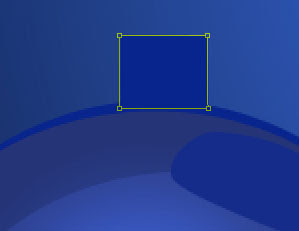
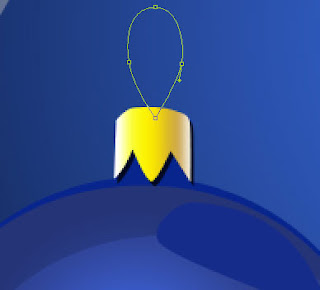
Select again the Pen Tool (P) to draw the top part of the fir tree ball. Its shape may be corrected with the Convert Point Tool.
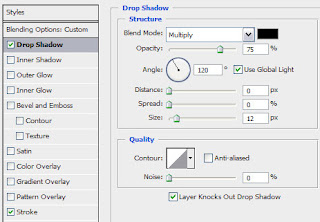
The layer’s parameters: Fill 0% Blending Options>Drop Shadow
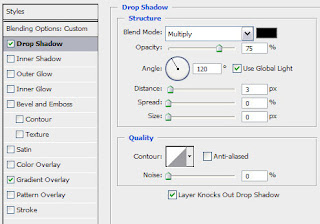
Blending Options>Gradient Overlay
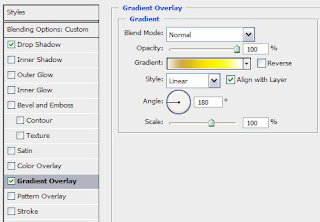
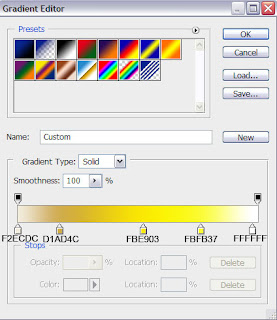
Gradient’s parameters:

Next select the Ellipse Tool (U) and the Convert Point Tool to represent the wire ring on the ball, reserved for the thread. This new made layer must be situated under the previous layer on the layers’ panel.
The layer’s parameters: Fill 0% Blending Options>Drop Shadow
Blending Options>Stroke
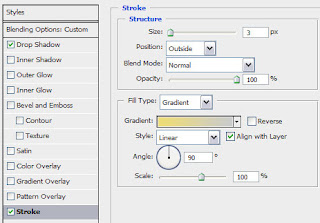
Gradient’s parameters:
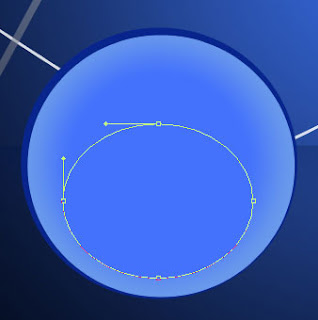
 Represent the next layer of the fir tree toy. For the beginning select the Ellipse Tool (U) and then the Convert Point Tool that will be helpful in changing the element’s tops. The layer has the color #092894
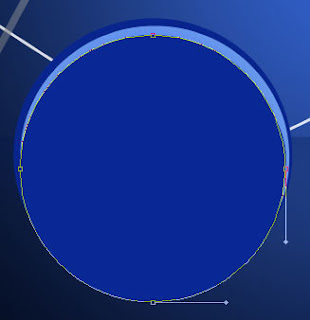
 Applying the described above method, try to represent the next layer belonging to the same toy.
 The layer’s parameters: Fill 0% Blending Options>Inner Shadow
 Blending Options>Gradient Overlay
 Gradient’s parameters:
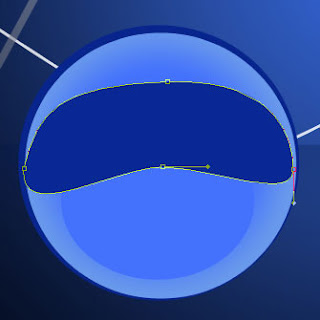
 Using the Pen Tool (P) and the Convert Point Tool, it’s possible to draw the shadow on the right top. Choose the color #152C8A
  Next represent the top part of the ball, applying the Rectangle Tool (U) and the color #08258D
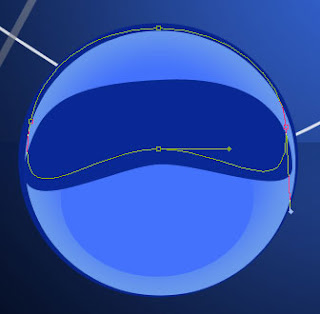
 Select again the Pen Tool (P) to draw the top part of the fir tree ball. Its shape may be corrected with the Convert Point Tool.
 The layer’s parameters: Fill 0% Blending Options>Drop Shadow
 Blending Options>Gradient Overlay
 Gradient’s parameters:
 Next select the Ellipse Tool (U) and the Convert Point Tool to represent the wire ring on the ball, reserved for the thread. This new made layer must be situated under the previous layer on the layers’ panel.
 The layer’s parameters: Fill 0% Blending Options>Drop Shadow
 Blending Options>Stroke
 Gradient’s parameters:

 Combine in a group all the layers composing the fir tree’s ball (press Ctrl button to mark out the necessary layers and then hold on the left mouse’s button while taking the marked layers on Create a new group selection). Make two copies of the represented group and then select Free Transform option to change the copies’ sizes, placing them under the layers belonging to the blue ball. Change the parameters for the copied layers to get a red and green nuance for the copies. The parameters for the red ball The primary layer: Blending Options>Inner Shadow
 Blending Options>Gradient Overlay
 Gradient’s parameters:
No comments:
Post a Comment