 Set the next parameters for the made layer by making a mouse click on this layer on the layers’ palette. Blending Options>Gradient Overlay
 Gradient’s parameters:


Next we’ll represent the snow hills, applying the Pen Tool (P) and Convert Point Tool for the corrections on the made elements.
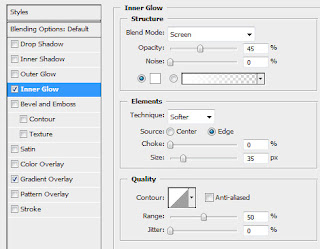
 The layer’s parameters: Blending Options>Inner Glow
 Blending Options>Gradient Overlay
 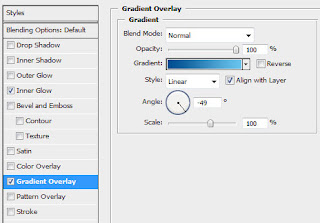 Gradient’s parameters:
 Next choose the Custom Shape Tool (U) and pick up a fir tree’s figure, having the color #003274
 Make seven copies of the tree’s silhouette and select the Free Transform option to change the copies’ sizes, placing them the same way demonstrated below:
 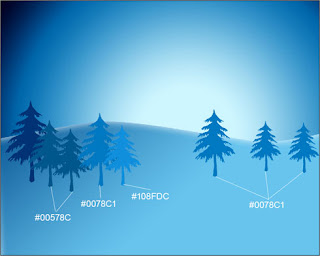 Using the Custom Shape Tool (U), let’s represent a lot of snowflakes, having different sizes:
 Continue representing the snow hills, selecting the same Pen Tool (P) and Convert Point Tool, having the color #A7FEF6
No comments:
Post a Comment