Create a new file (File>New) of 1280x1024 px and 72 dpi. Using the Rectangle Tool (U), try to represent the background of the picture to be.

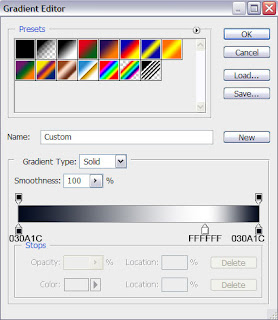
Set the next indicated parameters for on the last made layer by making a mouse click on the layer on the layers’ palette. Blending Options>Gradient Overlay
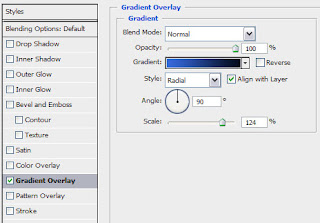
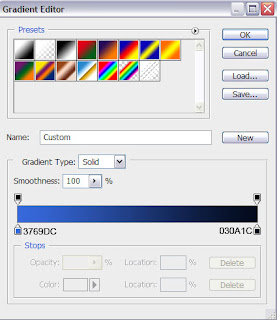
Gradient’s parameters:

Next represent a kind of plane on the bottom part of the picture, applying the same tool.
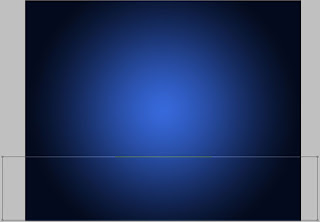
The layer’s parameters: Fill 0% Blending Options>Inner Glow
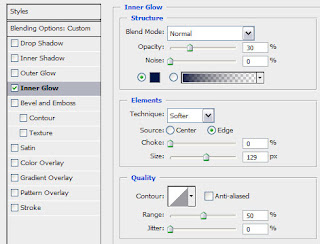

Using the
Pen Tool (P) and the Convert Point Tool, draw a small ribbon like that one from below:
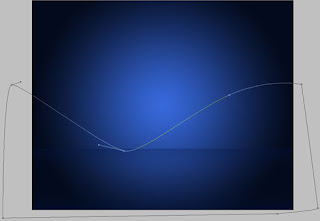
The layer’s parameters: Fill 0% Blending Options>Stroke
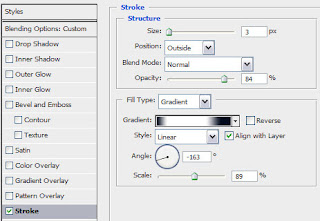
Gradient’s parameters:


Represent one more ribbon, applying the previous tools (Pen Tool (P) and the Convert Point Tool).
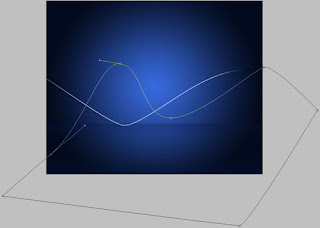
The layer’s parameters: Fill 0% Blending Options>Stroke
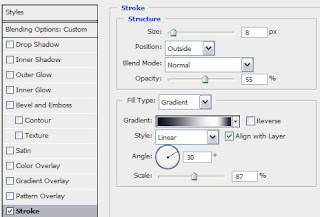
Gradient’s parameters:

Applying the
Ellipse Tool (U), it’s possible to represent the primary layer belonging to a fir tree ball.
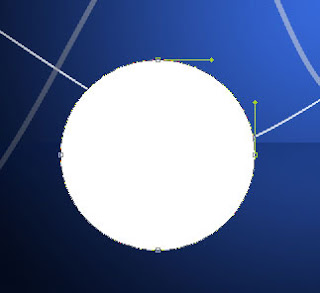
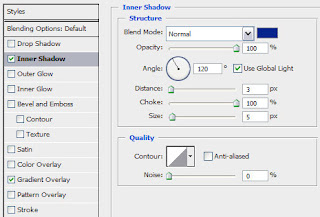
The layer’s parameters: Blending Options>Inner Shadow
Blending Options>Gradient Overlay
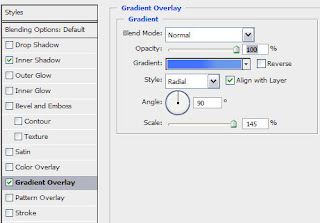
Gradient’s parameters:
 Set the next indicated parameters for on the last made layer by making a mouse click on the layer on the layers’ palette. Blending Options>Gradient Overlay
 Gradient’s parameters:
 Next represent a kind of plane on the bottom part of the picture, applying the same tool.
 The layer’s parameters: Fill 0% Blending Options>Inner Glow
 Using the Pen Tool (P) and the Convert Point Tool, draw a small ribbon like that one from below:
 The layer’s parameters: Fill 0% Blending Options>Stroke
 Gradient’s parameters:
 Represent one more ribbon, applying the previous tools (Pen Tool (P) and the Convert Point Tool).
 The layer’s parameters: Fill 0% Blending Options>Stroke
  Gradient’s parameters:
 Applying the Ellipse Tool (U), it’s possible to represent the primary layer belonging to a fir tree ball.


No comments:
Post a Comment