 Using the Ellipse Tool (U), try to make a circle as the next picture indicates it.
 Find after that Blending Options>Outer Glow by making a mouse click on this layer on the layers' panel. Set the next shown parameters:
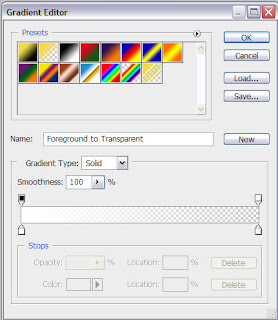
 Set the appropriate gradient now:
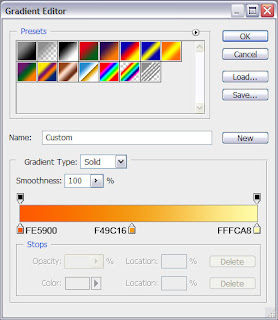
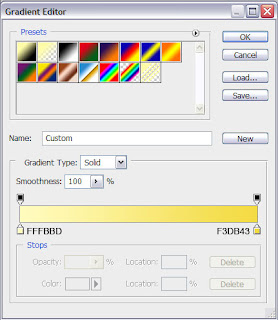
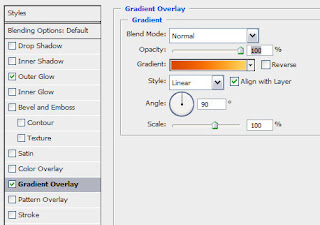
You may see below the gradient's composing colors:

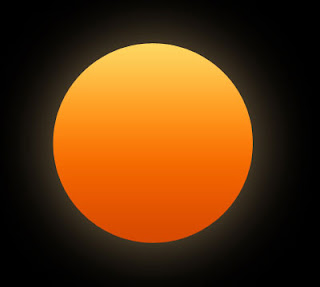
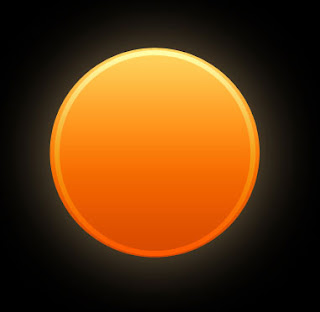
You must get the same result demonstrated next image:
 After that we'll represent another circle, placing it the same way demonstrated below:
 Fill 0% for this layer on the layers' panel:
 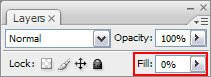 Set the Stroke for the made circle, following the parameters from below:
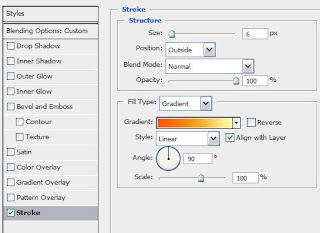
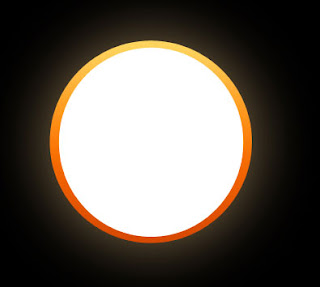
 We should get a kind of gradient outline, like on the next image:
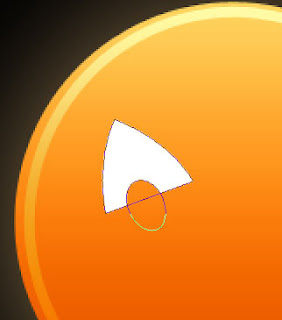
 Now we'll select the Pen Tool (P) and represent a triangle, then the Convert Point Tool will be used for adjusting the elements' tops. Press ALT button while getting a circle with the Ellipse Tool (U).
 Make a copy of the made eye (Ctrl+J) and turn it over with the Free Transform option (Ctrl+T). Then make a circle and select the Rectangle Tool (U) to cut out small rectangles, getting this way the teeth.
 The nose can be made with the Pen Tool (P). We've got a kind of mug:
 All the elements need the parameters demonstrated next table:
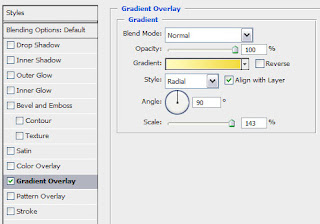
 This is the result we must get on this stage:
 Try to make now a new circle, adjusting it with the Direct Selection Tool (A).
 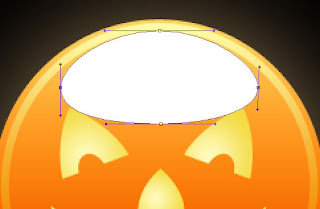 Fill 0% for the layer and set the appropriate gradient shown next table:
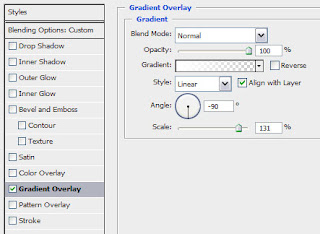
 We've got a highlight:

Make copies of all the layers, except the one belonging to the background, press Ctrl button to mark out the necessary layers and put them together by pressing Ctrl+E. Turn around the new layer that we've got and erase it the same way shown next picture, applying the Eraser Tool (E).
 Finished!
After that we'll represent another circle, placing it the same way demonstrated below:Fill 0% for this layer on the layers' panel: Set the Stroke for the made circle, following the parameters from below:  We should get a kind of gradient outline, like on the next image:
 Now we'll select the Pen Tool (P) and represent a triangle, then the Convert Point Tool will be used for adjusting the elements' tops. Press ALT button while getting a circle with the Ellipse Tool (U).Make a copy of the made eye (Ctrl+J) and turn it over with the Free Transform option (Ctrl+T). Then make a circle and select the Rectangle Tool (U) to cut out small rectangles, getting this way the teeth.
 The nose can be made with the Pen Tool (P). We've got a kind of mug:
 All the elements need the parameters demonstrated next table:
 This is the result we must get on this stage:
 Try to make now a new circle, adjusting it with the Direct Selection Tool (A). Fill 0% for the layer and set the appropriate gradient shown next table:
  We've got a highlight:
Make copies of all the layers, except the one belonging to the background, press Ctrl button to mark out the necessary layers and put them together by pressing Ctrl+E. Turn around the new layer that we've got and erase it the same way shown next picture, applying the Eraser Tool (E).
 Finished!
No comments:
Post a Comment