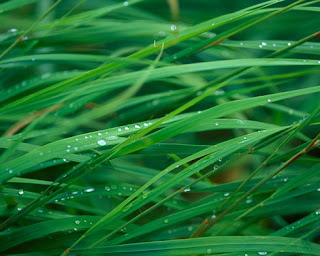
Start working by finding a picture of 1280x1024 px and 72 dpi, having represented on it the dew on the green grass
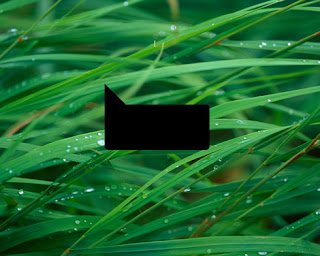
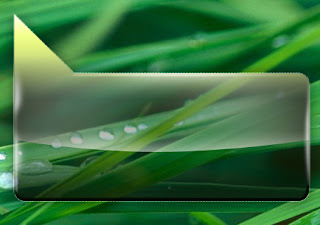
Create the basis for the shape we want to have in the end. In this case we’ll use the Rectangle Tool (U) with the radius of 15 px. Press SHIFT button while applying the Rectangle Tool (U) and insert a small fragment which may be corrected with the Convert Point Tool (draw down the right top of the fragment)

Create a new file (File>New) of 4x1 px and 72 dpi. Select the
Pencil Tool (B) (brush - 1 px) to represent a pattern of white color.

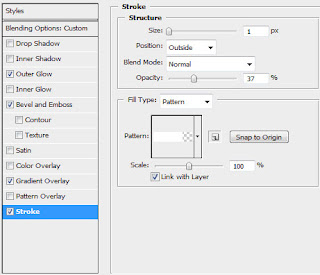
Edit>Define Pattern Select for the layer containing the pattern the next indicated parameters by making a mouse click on this layer on the layers’ panel. Fill 30% Blending Options>Outer Glow
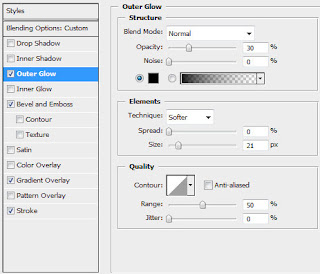
Blending Options>Bevel and Emboss

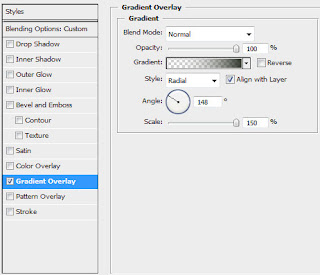
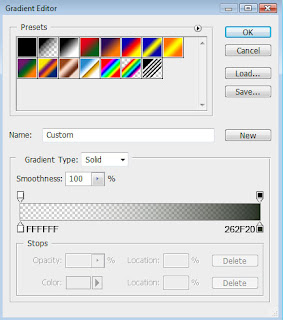
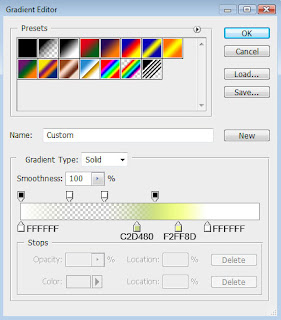
Blending Options>Gradient Overlay
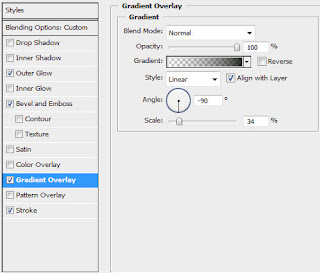
Gradient’s parameters:
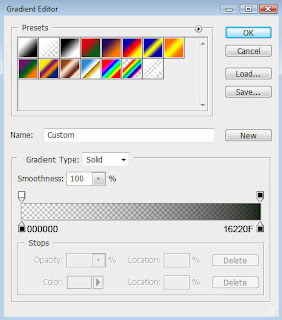
Blending Options>Stroke (here we shall select the earlier made pattern)
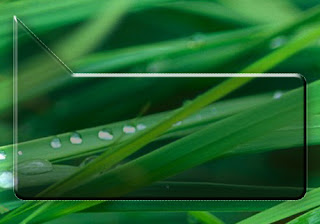
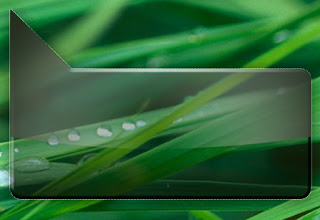
Make a copy of the recently made layer and select the Delete Anchior Point Tool to erase the bottom tops. Using the Add Anchior Point Tool, it’s possible to insert a top on the middle part of the bottom part. The placement of the bottom tops may be changed with the Convert Point Tool. Don’s forget also to change the layer’s parameters of the copy on those you may see below:
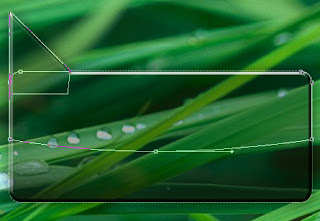
The layer’s parameters: Fill 0% Blending Options>Gradient Overlay
Gradient’s parameters:
Make a copy of the last made layer and select for the copy the next demonstrated parameters: Fill 0% Blending Options>Gradient Overlay
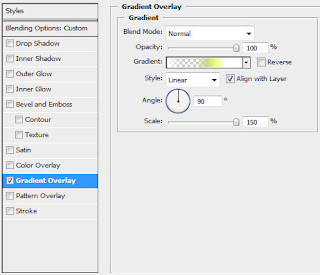
Gradient’s parameters:
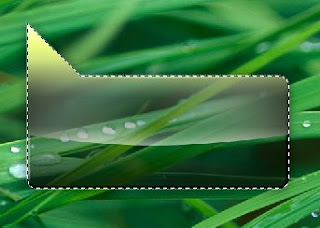
Create a new layer. Then we're holding Ctrl button and click on the first layer of the shape basis, to get a selection:
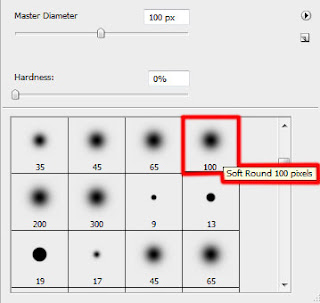
Using the standard brush on a new layer, try to make several markings along the edges. The highlights of white color shall be introduced on the left and right sides.
It’s time to add the text, keeping the next shown demands:
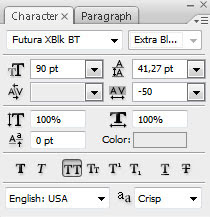
GREEN
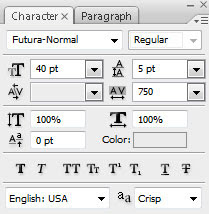
NATURE

Choose for the both words’ layers the same parameters demonstrated next image: Blending Options>Drop Shadow
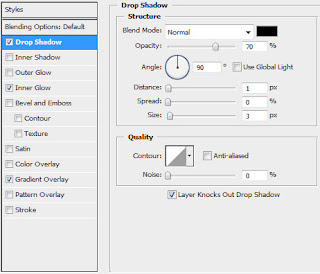
Blending Options>Inner Glow
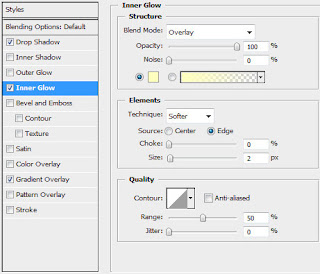
Blending Options>Gradient Overlay
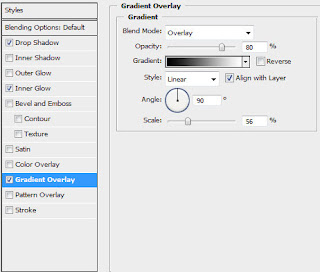
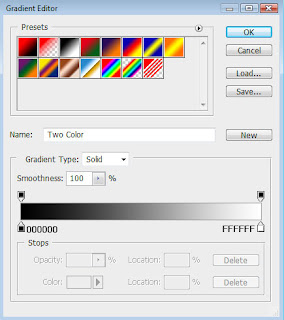
Gradient’s parameters:

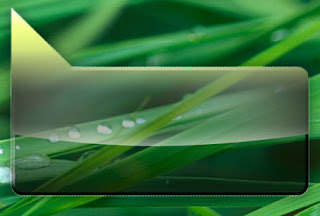
Here we have the nice green wallpaper!
 Create the basis for the shape we want to have in the end. In this case we’ll use the Rectangle Tool (U) with the radius of 15 px. Press SHIFT button while applying the Rectangle Tool (U) and insert a small fragment which may be corrected with the Convert Point Tool (draw down the right top of the fragment)
 Create a new file (File>New) of 4x1 px and 72 dpi. Select the Pencil Tool (B) (brush - 1 px) to represent a pattern of white color.
 Edit>Define Pattern Select for the layer containing the pattern the next indicated parameters by making a mouse click on this layer on the layers’ panel. Fill 30% Blending Options>Outer Glow
 Blending Options>Bevel and Emboss
 Blending Options>Gradient Overlay
 Gradient’s parameters:
 Blending Options>Stroke (here we shall select the earlier made pattern)
 Make a copy of the recently made layer and select the Delete Anchior Point Tool to erase the bottom tops. Using the Add Anchior Point Tool, it’s possible to insert a top on the middle part of the bottom part. The placement of the bottom tops may be changed with the Convert Point Tool. Don’s forget also to change the layer’s parameters of the copy on those you may see below:
 The layer’s parameters: Fill 0% Blending Options>Gradient Overlay
 Gradient’s parameters:
 Make a copy of the last made layer and select for the copy the next demonstrated parameters: Fill 0% Blending Options>Gradient Overlay
 Gradient’s parameters:
 Create a new layer. Then we're holding Ctrl button and click on the first layer of the shape basis, to get a selection:
 Using the standard brush on a new layer, try to make several markings along the edges. The highlights of white color shall be introduced on the left and right sides.
 It’s time to add the text, keeping the next shown demands:
 GREEN
GREEN NATURE
 Choose for the both words’ layers the same parameters demonstrated next image: Blending Options>Drop Shadow
 Blending Options>Inner Glow
 Blending Options>Gradient Overlay
 Gradient’s parameters:
 Here we have the nice green wallpaper!
No comments:
Post a Comment